- Converting text to a PDF (SIMPLE)
- Basic Formatting Options in OpenOffice Writer:
- Re: PDF Reader Popup Table of Contents
OpenOffice Writer is one of the programs included in the OpenOffice suite which is a free program that is comparable to MS Office. It is a very powerful word processor. It also has a function to convert a document loaded into Writer or created in it into a quality PDF file. The conversion to PDF is fairly simple. You can download it HERE for Windows, macOS and Linux.
The program's word processing itself is fair complicated in some respects until you become familiar with all it's features but if you just want to create a simple PDF of ie a Facebook post, you can simply Copy the text and Paste it into the program and follow the below instructions to create a PDF. That by default will create a printer sized PDF which may not be the best if people are going to be viewing it on smaller screens as the reduction will make the text quite small. I will deal with the function of changing the size of the output to a more "book sized PDF" below.
If you are already familiar with using LibreOffice Writer (another verson) or MS Word, much of the below can be done from those programs as well although the placement of the tools may be different.
Converting text to a PDF (SIMPLE)
Once your are satisfied with the way the text looks you can simply choose "File" in the upper left hand corner. A drop down menu will appear. Click on "Export as PDF."
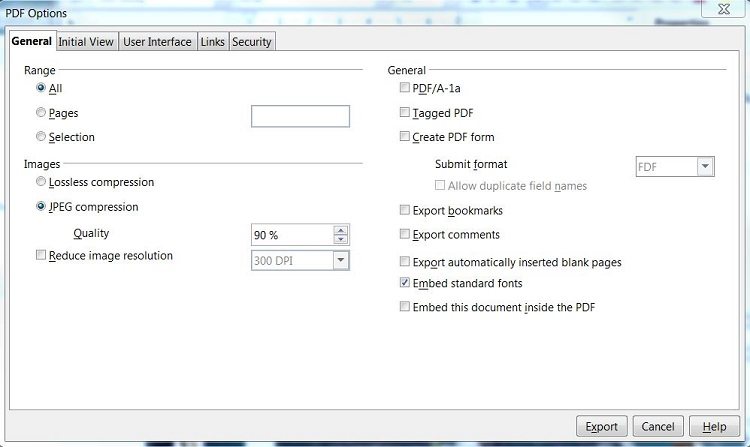
A separate box will appear with options related to exporting the document as a PDF. If you just want a simple PDF, the default will be just fine and you can just choose "Export" at the bottom left of the box.
Another Box will appear that will allow you to choose the file name you want and the location. It's pretty much standard procedure as with all programs. When you are finished naming the file and selecting the directory to put it in, simply click on "Save" at the bottom right of the page. You now have a PDF of the document. It's that simple!
Basic Formatting Options in OpenOffice Writer:

Basically, the icons for formatting functions in the image above are pretty standard today in most word processors. Most of these functions require you to select the text that you want to format. (You can even select the entire text of the document. In the lower left section of the menu you will see drop down boxes to choose the name of the font and the size for different elements you will select. As you make that choice, the selected text will automatically be changed to what you have selected. Now the most common formatting items are to the right of the font selection boxes in the lower right of the image. (Note that the menu goes farther to the right than the image shows.) The three most common formatting items you will likely use are to highlight text:
B for bold
I for italics
U for underline
You can use all three at the same time if you like. They are independent of each other. Once you have clicked on one of the above it will show up with a square frame around it so you know it is active.
The next four icons to the right made up of horizontal lines allow you to place the text where you want it in the line. From left to right they are:
1. Text to the left
2. Text to the center
3. Text to the right
4. Text justified so paragraphs end up with a smooth line up on the left and right sides of the paragraph. (The paragraphs are "justified" on this webpage.)
ALL of the formatting functions mentioned above and shown in the above image can also be found in the "Properties" sidebar to the left of the interface and much more. (Image Below.) You will be happy to know while learning this program that when you let the mouse hover over any item, a popup text box will appear describing that function.
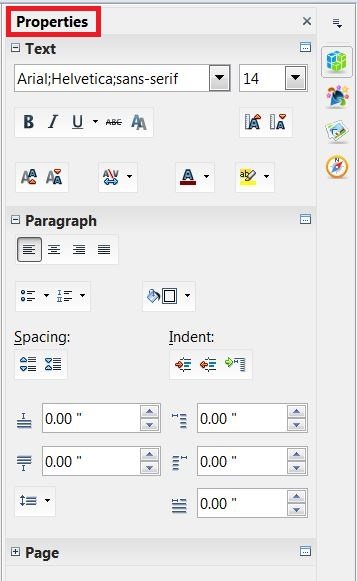
In the image below,captured from the middle of the sidebar, you will see two items at the top. "Spacing" and "Indent." If you click on the first one, "Spacing," it will space the paragraphs either further apart or closer together. If you click on "Indent," the paragraph will be indented from the left margin. You will notice below these two items 5 items that are of the dropdown menu style. You will see that of the six items, one of them does not have a dropdown menu that can be seen in the image. These items are the finer paragraph adjustments you can make on any or all of the paragraphs you have highlighted. The top 4 are merely fine tune adjustments of the above "Spacing" and "Indent" functions.
The bottom two are not as obvious. The left one is line spacing in the highlighted paragraph. The right one is used if you want the first line of each paragraph highlighted to be indented and how much. In the "old days," paragraphs did not have any spacing between them but the first line was indented. That is still valid but more and more, formatters and publishers are simply putting an empty line between each paragraph with no first line indentation that is the common way of most web pages. You can accomplish that without touching any of these paragraph controls but simply having a blank line between paragraphs in your original text.
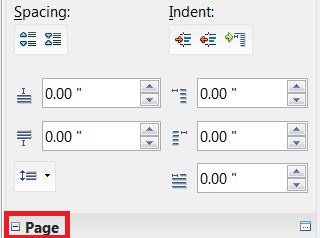
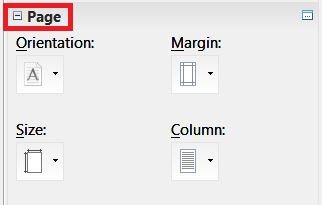
You will notice at the bottom of the above image that there is a small icon and the word "Page" after it. If you click on it, it will open the lower end of the formatting bar with items that relate to the page configuration itself.
- Click on the "Orientation:" icon and choose "Portrait" or "Landscape."
- Click on the "Margin" icon and you can choose either preset margins or use the drop down boxes below that to custom configure the margins.
- Click on the "Size" icon and a selection of limited sizes are made available. If you are formatting to create an ebook, choosing a smaller book size will be crucial. If those sizes will not work, you can choose "More Options" and a larger popup box will appear with a lot of Page Options to chose from. Professionals will likely use this Option to configure their pages in ebooks or PDF's for "Print On Demand" as the printers all have their own very strict standards.
- Click on the "Column" icon and you will be provided with various configurations of columns.
Now you have a pretty good start on learning to use OpenOffice Writer. These are by no means all of the finer professional functions available but for the most part will do quite well for most normal formatting of your document. The reality is that the best way to learn is to practice on the program with something none-essential that you are not under pressure to finish right away.
Re: PDF Reader Popup Table of Contents
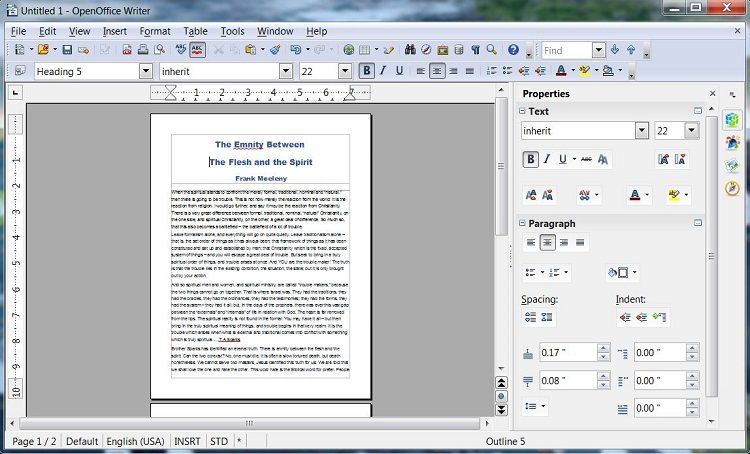
If you have a larger document and want to include a popup table of contents or bookmarks that is actually easy to do by simply highlighting the text of the section heading and opening the Text Style drop down at the bottom left of the tool bar and choosing ie "Heading 1." You can change font size to the right of that. If you want a nested TOC with subtopics, you can simply do the same thing but choose ie "Heading 2" and choose a smaller font size. Ditto for subsequent layers. Now there is one thing about what I am telling you is that if you use the "Heading 1,2,3, etc." for anything else, that will show up on your popup TOC/bookmarks items as well so you will have to avoid doing that except for TOC items.
After you have saved the document you can follow the directions to "Export as PDF" BUT, you will have to click on the checkbox for "Export bookmarks" that is located about in the middle of the right side of the screen. Now, when you click on the "Export" button at the bottom right of the "PDF Options" box, it will automatically create your T.O.C. from the above header/bookmarks. You do not need to create special bookmarks to do this.
There is a catch though to doing this. In the text that you highlight and choose "Heading 1,etc.," there must -NOT- be any line breaks in that text or it will show up as two bookmark/TOC items instead of one. If the text wraps around to the next line that is ok but never have a line break in the text. <ENTER>